In this article, we will learn how to config database, create model, migration, controller, and resources. And also explaination about that.
1 - Create Model
Open new terminal on your project (laravel-api-blog), and type:
php artisan make:model Product -m
This action will make 2 files:
-
app/Models/Product.phpIn this file, add some code:
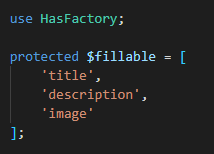
Explaination: protected $fillable used for input/update data, you need to register the field name for mass assigment.
-
products_table.php (in database/migrations)(we will get different name, because this generate automatically. My products migration name: 2022_11_04_103523_create_products_table.php)

Explaination: in laravel, we use migration for create & setting field in yout table.
2 - Configure Database Connection
Open the project, search file .env. Change DB_DATABASE to your database name in your local computer. (if you use laragon, you just need to setting this one. My DB_DATABASE name = laravel-api-blog).
3 - Create Database
Open your database management (such as phpmyadmin, navicat, dbeaver. I use navicat), and make new database (laravel-api-blog).
4 - run this command on terminal:
php artisan migrate (run your migrations, this command will make new table)
php artisan storage:link (this command will make Symbolic Link in your project, to make link)
5 - Make API Resource
Open terminal and type:
php artisan make:resource ProductResource
We need this file to convert format from model become JSON. With this feature, we convert JSON format faster and easier.
6 - Make Controller
Open terminal and type:
php artisan make:controller api/ProductController
This command will make new file name ProductController, and we will make function for create, read, update, and delete in here.